Growing Green Beans

Several green beans
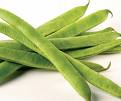
Green beans, aka snap beans or string beans, are pretty easy to grow in the Midwest. They are a very popular warm season vegetable.

Types

There are two groups of beans: bush and pole. Bush beans grow as a bush and require no support while pole beans need a framework to hold them up. We have had great luck with Blue Lake 274 bush beans. They take 58 days to harvest and are plump with good yield. Also, they are bean mosaic resistant.
A good pole bean is Blue Lake which takes 65 days to harvest and are stringless.

Planting

Plant after the last frost (May 15th in Peoria area) has subsided. We have always grown beans from a seed which you can get in packets from a nearby supply store. Space out planting 2 weeks so a plentiful supply is available through August. Do not plant beans in the same spot as last year since disease and/or pests may have wintered over. It is best to get new bean seeds every year.

Depth

Beans are planted at a depth of 1 inch. Bush beans are spaced out 4 inches between beans and 18 to 24 inches between rows. Pole beans are planted 6 inches apart in rows of 30 inches. Water after planting. Do not soak beans in water before planting as they tend to crack.

Care

Beans have a shallow root system so cultivating nearby with a hoe can damage them. We recommend hand-picking weeds within 1 foot of the plant after a rain if possible. We have had good luck mulching bean plants as it keeps the ground at a more stable temperature and holds moisture in.

Fertilizer

Since beans are legumes, they require no additional nitrogen. A 0-10-10 fertilizer will work well but can be hard to find.

Harvest

Pick beans after they are thoroughly dried (i.e. do not pick in the morning). The beans should be plump and long. Bean plants are brittle and easy to break so be careful. You can use a small scissors and snip the bean off or carefully yank on it. The plants will continue to generate new beans after they are harvested. We usually get 3 or 4 pickings in a season.
Toss the beans in a plastic bucket as they are harvested. Store unwashed until ready for use. Remember, the best tasting beans are immature ones; that is they do not have full seeds in them. The longer they linger on the plant, the tougher they become.

Problems

Bean mosaic disease turns leaves yellow and reduces yield.
Bacterial bean blight causes bright yellow or brown spots on the leaves. Avoid contact with wet plants and use disease-free seeds.

Storage

Beans can be stored, unwashed, for up to 3 days in a plastic bag in the vegetable crisper part of the refrigerator. The bag prevents moisture loss and wilting. Green beans are excellent candidates for canning. We have canned them nearly every year. Beans dated 2004 are still being used in our soups or casseroles. Before freezing, the beans need to be blanched.

Doug

Growing Broccoli

Broccoli floret
Enjoy easy to grow broccoli in your garden.

Summary

  • Planting method: Transplant 4-6 weeks before last spring frost date; for fall crop, transplant in late summer.
  • Spacing: 12-24 inches in rows 24 inches apart; 1 per square foot for intensive beds
  • Days to harvest: 55-65
  • High in vitamin C and beta carotene

Varieties

Many varieties do well in the home garden. Try two each year. Choose the one you like better and grow it again the following year with yet another variety. Keep doing this each year. This is a simple way to find out which variety does best in your garden.

  • Cruiser (58 days to harvest; uniform, high yield; tolerant of dry conditions)
  • Green Comet (55 days; early; heat tolerant)
  • Green Goliath (60 days; spring, summer or fall; tolerant of extremes)

Planting

Get broccoli into the garden as early as possible. Start your own seeds 4 to 6 weeks ahead of the frost-free date in your area orr buy transplants from a reliable garden center. Look for compact, stocky plants.

Broccoli plants grow upright, often reaching a height of 2 1/2 feet. Space plants one foot apart in all directions in beds.

Transplants are recommended though you can start from seed. Set seedlings outdoors as soon as you can work the soil. If frost threatens, protect the seedlings with cloches. To prevent cutworm damage, place a two-inch collar of stiff paper around the stem of each plant before planting. At least 1 inch of the collar should extend below the soil line, with 2 inches above. Space rows about 2 feet apart, with at least 20 inches of space between the plants.

Maintenance

Use starter fertilizer for transplants and side-dress with nitrogen fertilizer (10-10-10) when the plants are half grown.

Broccoli likes a lot of water. Use a thick mulch around each plant to keep soil moist. Weed regularly.

Broccoli has two mortal enemies: rabbits and cabbageworms. Protect the plants with a fence or small, individual wire cages. I use cut-up 1 gallon milk jugs. Because rabbits stop feeding on broccoli when it gets big, remove the cages when the plants get large. To combat worms, spray broccoli plants at weekly intervals with Bacillus thuringiensis (Bt), a biological control that kills worms but is totally safe to animals and humans. Organic gardeners accept its use.

Harvest

Pick the green flower buds before they start to spread into little yellow flowers. The buds should be firm and tight, just as they are in the grocery store, and 4 to 6 inches in diameter. Cut the bud with a sharp knife five inches down the stalk.

Heads that start to flower are past their prime, although the flowers are decorative and edible. A number of smaller buds will form below the central bud after you pick it. Harvest these in the same way as the original, larger bud. Keep harvesting to force continued production.

Storage

Store the broccoli, *unwashed*, in loose or perforated plastic bags in the vegetable crisper of the refrigerator up to 5 days. Broccoli left unrefrigerated quickly becomes fibrous and woody. Wet broccoli quickly becomes limp and moldy in the refrigerator. Old broccoli may look fine, but it develops strong undesirable flavors. It tastes best and is highest in nutritional value when storage time is brief.

Troubleshooting

Nipped leaves – rabbits
Holes in leaves – diamondback worms
Yellow flowers – Heads ready to flower. Planting too late in the spring or failing to give the plants a good start contributes to this condition. Premature flower development also may be caused by interrupted growth resulting from extended chilling of young plants, extremely early planting, holding plants in a garden center until they are too old or too dry, and severe drought conditions.
Small heads – They form soon after plants are set in the garden (called “buttons”) and usually result from seedlings being held too long or improperly before sale or planting.

Recipes

Try this stir-fried steam broccoli recipe. I make this ad infinitum when broccoli is in season. Also frozen broccoli works well, too, in the off-season.