 Instructions
Cucumbers do not like their root system disturbed, so if you decide to start them indoors, use a peat pot so they can be directly transplanted.
Planting Cucumbers
Cucumbers can grow as a vine or as a bush. Growing as a vine on a trellis keeps the fruit clean.
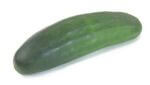
Purchase some cucumber seeds according to what you intend to use them for. Cucumber varieties are divided into pickling, slicing, burpless and space-saver variety categories. Burpless cucumbers, both American and Asian types, contain low or no cucurbitacin, the compound that causes bitterness and increases one’s susceptibility to ‘burping’ after eating the fruits.
Decide if you want to give your cucumbers a head start by germinating them indoors (in peat pots, planting cells or pots) or waiting until there is absolutely no chance of frost left (2 weeks after last frost), and planting them right out into your vegetable garden.
Choose where in your garden is best suited for growing cucumbers. Cucumbers require full sun and plenty of warmth to grow. They also require soil that is quick draining; cucumbers do not tolerate having soggy roots.
To plant directly in the ground, prepare the area you want to plant your cucumber seeds. Turn the area over with a shovel and work in fertilizer at approximately one pound per 100 square feet. Use your rake to level and smooth the area.
Make a hill before planting the cucumber. Just a small rise in the ground is adequate. Build the hill, or mound, about a foot in diameter and about three inches high; this is to drain water from around the stem. Plant the cucumber in the mound.
With your trowel, dig 1-inch deep holes that are six to eight inches apart. Each row should be spaced at approximately three feet apart. Place two to three seeds in each hole and cover the hole up firmly with dirt. Now is a good time to use garden stakes so that you know exactly where you planted your seeds.
Check the seeds every day, keep the seeds moist, not drenched. Once your cucumber seedlings get to be approximately three to four inches tall, thin them out so that only one plant remains in each planted area.
Maintenance
Continue to keep your cucumbers well watered. The National Gardening Association recommends keeping the soil evenly moist to prevent cucumbers from becoming bitter. Try not to get moisture on the leaves which will help prevent leaf-related diseases.
The National Gardening Association also suggests that when your cucumbers reach about four weeks of age, to fertilize them with a 5-10-10 fertilizer (5% nitrogen, 10% phosphorus and 10% potassium).
In approximately 55 to 65 days, your cucumbers should be ready for harvesting.
Planting in Pots
Start cucumbers inside 2 to 3 weeks before bringing outside. It is best to use peat pots so they do not have to be replanted as cukes do not like having their root system disturbed.
Fill up each peat pot, or planting cells, three-quarters full with seed starting mix. Water each thoroughly, making sure you have a tray underneath to catch the excess water.
Place two to three seeds into each planting receptacle, cover with one inch of the seed starting mix. It’s imperative to maintain an adequate amount of light for your cucumber seeds to germinate. They should receive 12 to 14 hours of sunshine a day. Temperature should be kept above 55 degree F.
Check the seeds daily, keep them moist by spritzing with water as soon as the soil dries out. After the seeds have sprouted, it’s recommended you thin them down to only one cucumber seedling per planting receptacle. When seedlings achieve about three inches in height, you can plant them out of doors right into your vegetable garden.
Transplanting Outdoors
With your trowel, dig holes that are double the size of each of your planting receptacles.
Do not need to remove the seedlings from the peat pots. To remove your cucumbers from pots, support the base of the plant with two fingers, turn upside down and gently tap the edge of the pot with your trowel until the pot begin to slide off. To remove from cells, simply push up from the bottom. Put the cells/pots aside.
Position your cucumber plant in a hole, make sure to line up the base of the plant level with the ground. While holding the cucumber in the hole, use your trowel and fill in the hole with plenty of dirt. Firm the soil with your hand, to remove air pockets.
Water each of your cucumber seedlings carefully, don’t saturate them, but water at the base of the plant and let the water soak in thoroughly. (Proceed from Step 7 above, in the section titled Planting Cucumbers).
Companion Plants
Good ones
Cucumbers do well with corn and beans since all three plants enjoy the same growing conditions. Corn also acts as a natural trellis for cukes while they enjoy the additional nitrogen in the soil provided by the beans.
Other crops that make good cucumber companion plants include beets, cabbage, carrots, garlic, lentils, peas, peppers, and radishes—which deter cucumber beetles. Tomatoes are also a good choice as a cucumber companion plant. Broccoli, cauliflower, lettuce, and onions also grow well alongside cukes.
Nasturtiums are said to improve the flavor and growth of cucumbers, while dill and oregano can help attract beneficial insects. Chives, with its pungent aroma, also repels aphids and Japanese beetles that can plague cucumbers. Oregano is another popular pest control herb and does well as a cucumber companion plant.
As a tea, chamomile soothes and calms, but as a companion plant for cucumbers it beckons beneficial predators like hoverflies and wasps that feed on pests, making it another one of the best herbs for companion planting.
Brightly colored marigolds repel beetles seeking to feed on cukes. Other flowers, like sunflowers, make for pollinator-friendly companion plants as well. Zinnias can help attract more pollinators to your cucumbers to ensure they’re properly pollinated and produce tons of fruit. Tansy flowers can also discourage ants, beetles, flying insects, and other pests.
Bad ones
Cucumbers and potatoes are not symbiotic and should not be planted near each other. Though many herbs are good companion plants for cucumbers, keep rue and sage away from them. Lovage and Jerusalem artichokes are also bad cucumber companion plants and should be grown elsewhere in the garden.
Plants like pumpkin, summer squash, and melon—which are in the same family as cucumbers—are not good planted in close proximity to cukes. Their similar growing requirements result in too much competition for nutrients and water. Also, since they are members of the same family (Cucurbita), they are susceptible to the same diseases and pests
Tips
Add cukes as succession plantings. Because cucumbers crave heat, they can follow cool spring crops of peas, spinach, and lettuce.
Provide steady moisture. A continuous water supply is necessary for the best quality fruits. A drip irrigation system is ideal in the cucumber patch. If this is not possible, water deeply once a week, applying at least one inch of water. Frequent but shallow watering will reduce overall yields.
Feed cucumbers well. Cucumbers, like other cucurbits (squash, melons, and pumpkins), are heavy feeders. If organic matter was incorporated into the soil prior to planting, fertilizer will not be needed early in the season. However, when the cucumber plants begin to blossom and set fruit, a side dressing of balanced soluble fertilizer will help keep the plants in production.
Use mulch to regulate the ground temperature.
Make sure that you see both male and female blooms. Male blooms usually appear first and then drop off, so don’t be alarmed if this happens. Within a week or two, female flowers will also appear; each one has a small cucumber-shaped swelling at the base that will become a cucumber.
Several pests bother cucumbers. Squash bugs may attack seedlings. Slugs like ripening fruit. Aphids can colonize leaves and buds. Straw mulch helps keep slugs at bay, as can trellising vines to get the fruit off the ground. Vines are also bothered by cucumber beetles, which chew holes in leaves and flowers and scar stems and fruits, but worse than that, they spread a disease that causes the plants to wilt and die. Powdery mildew is a disease that leaves white, mildew-like patches on the leaves. Apply fungicides at the first sign of its presence. To minimize disease spread, avoid harvesting or handling vines when leaves are wet.
You can pick cucumbers whenever they’re big enough to use. Check vines daily as the fruit starts to appear because they enlarge quickly. Vines produce more fruit the more you harvest. To remove the fruit, use a knife or clippers, cutting the stem above the fruit. Pulling them may damage the vine. Don’t let the cucumbers get oversized or they will be bitter, and will also keep the vine from producing more. Yellowing at the bottom (blossom end) of a cucumber signals overripeness; remove the fruit immediately. Harvest lemon cucumbers just before they begin turning yellow. Although they are called lemon cucumber because the little oblong or round fruits turn yellow and look like a lemon, by the time the fruit turns yellow it may be a little too seedy for most tastes.
You can keep harvested cucumbers in the refrigerator for 7 to 10 days, but use them as soon as possible after picking for best flaor. If you don’t eat a slicing cucumber all at once, cover the unused portion in plastic wrap to prevent dehydration in the refrigerator. In fact, it’s a good idea to wrap your whole cucumbers in plastic or store them in a zipper bag in the fridge to keep them crisp.
Bitter-tasting cucumbers are a common problem caused by high temperatures, dry soil, low fertility, or disease. Unhealthy plants produce poor-quality fruit. Once a plant produces a bitter cucumber, it must be removed because all subsequent cucumbers will be affected the same way.
 Growing potatoes (Solanum tuberosum) have been easy to do in the DDC garden. My favorite is Yukon Gold which I have a lot planted this year (2007). Others we have grown successfully in the past are Red Pontiac and the white Kennebec.
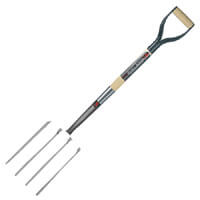 Normally potatoes are harvested after the vines die but if you want new potatoes (small, 1 to 2 inches in diameter) harvest them two or three weeks after the potato flowers. Since potatoes are about 8 inches underground I use a potato fork. Normal yield is about eight potatoes per vine. Late potatoes are harvested around August or early September. Two to three weeks before harvesting, cut the potato plants to ground level. This gives the potato skins time to toughen which makes for better storage.